Here we will list the different types of led strip detailing precisely how to connect them to the power supply, dimmers, amplifiers and controllers.
It is also explained how to connect several led strips without loss of light intensity after the first 5 meters.
- Precautions to take when installing a led strip
- The led ribbons white or single color
- The led ribbons variable blanks
- The led ribbons multicolor (RGB)
- The led ribbons multicolor + white (RGBW)
- The led ribbons multicolors + variable white (RGBCCT)
- The led ribbons with dynamic effects
Precautions to take when handling and installing a led strip
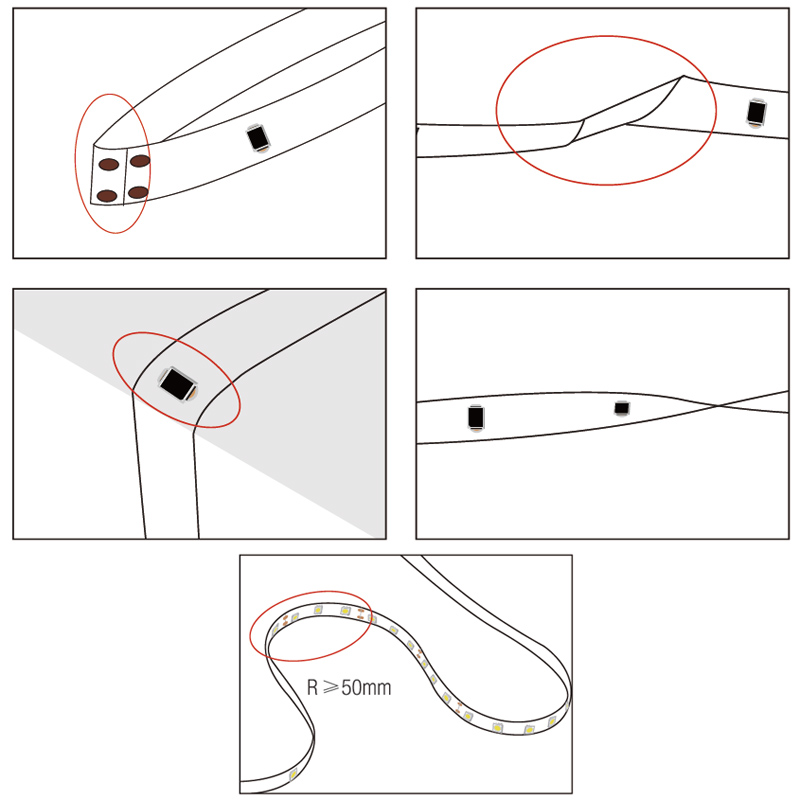
The led strips can be curved lengthwise by describing a minimum radius of 5 cm.
Under no circumstances can they be folded sideways.
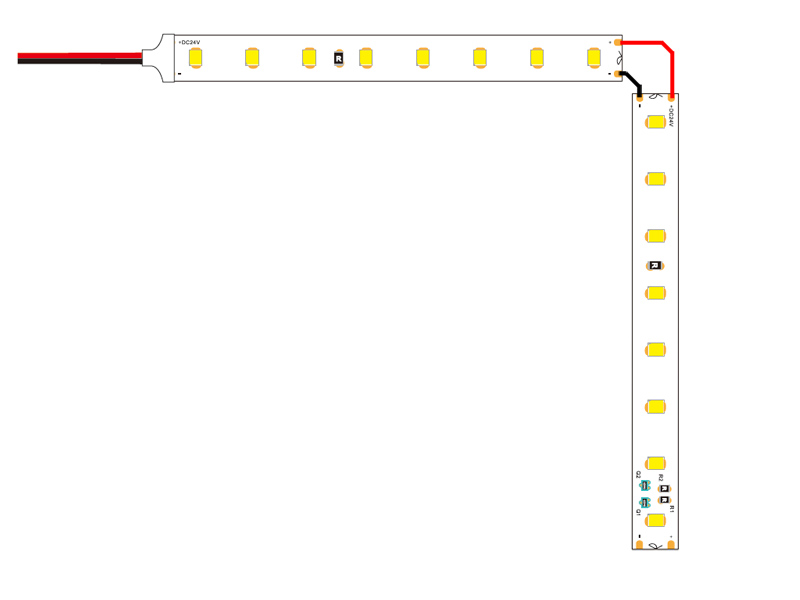
If you need to make 90° angles, it is essential to cut the tape in sections and connect them, either with a suitable angle connector, or better, by welding flexible cable (flat cable) between the 2 sections.
Do not bend the led strips or distort them:
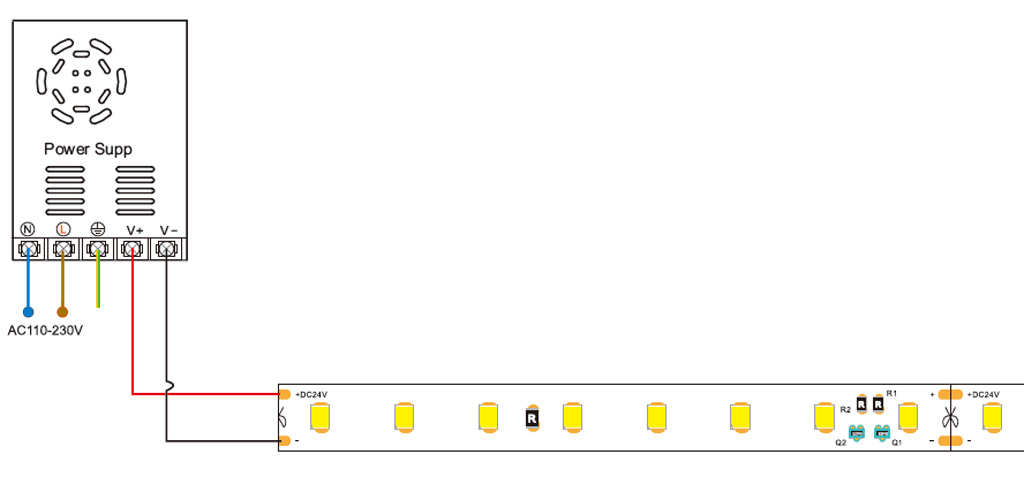
The white and single color ribbons
These headbands, the simplest, have only 2 wires (+ and -).
They can be connected directly to the 12 or 24V power supply. In this case, the wall switch in your home will be used to turn the lighting on and off.
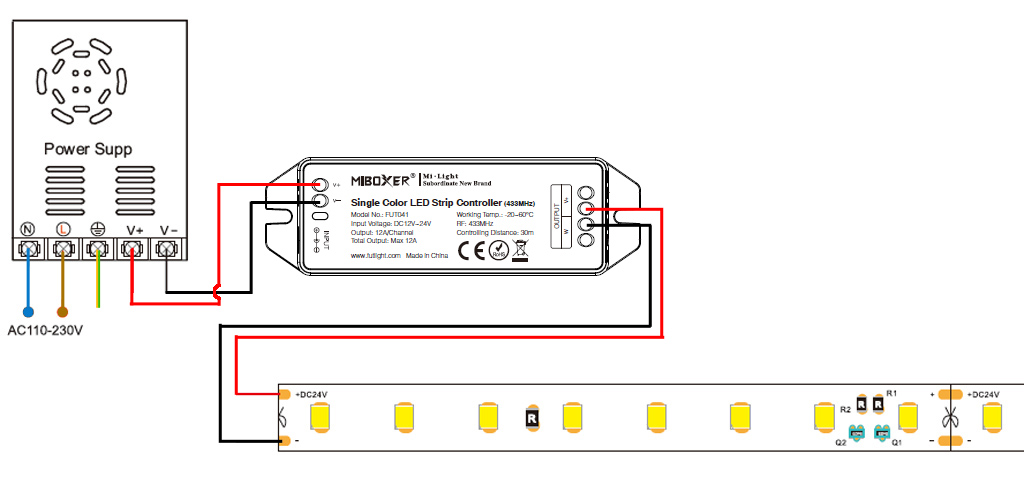
They can be paired with a dimmer to turn on, off and vary the brightness with a remote control.
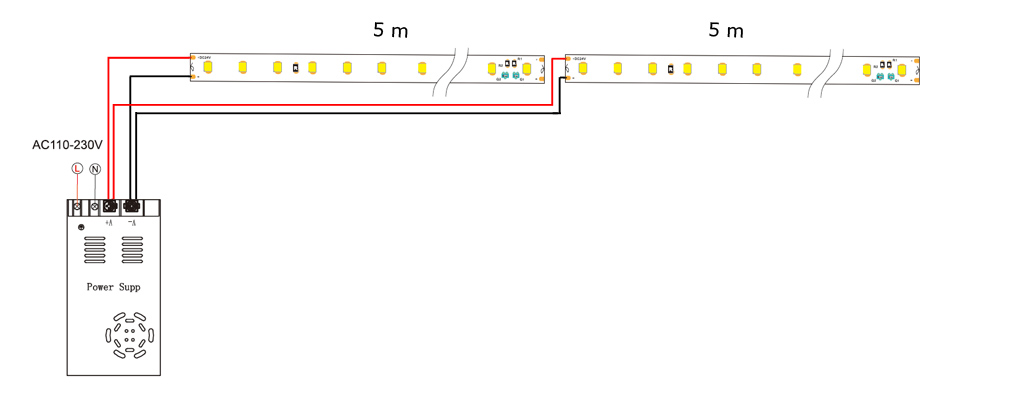
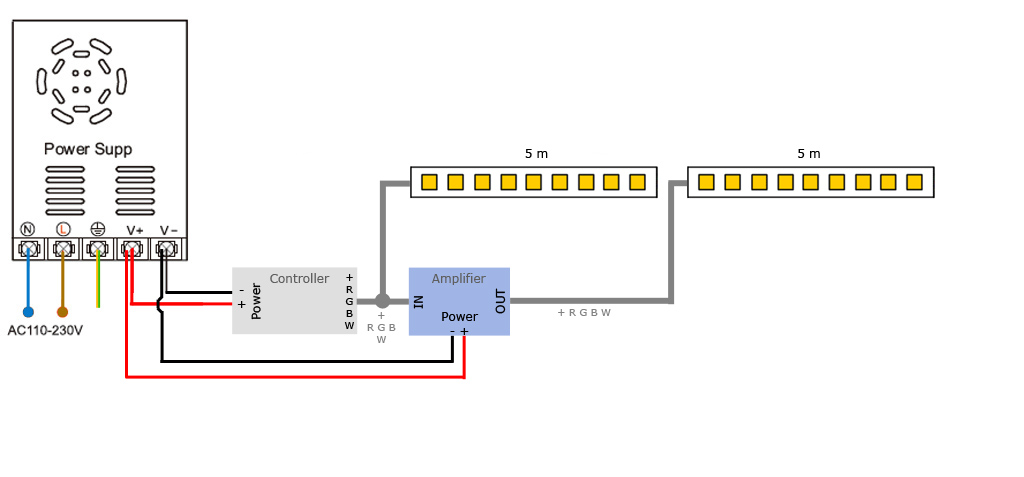
With the exception of certain models (specified in the product sheet), LED strips can only have a maximum length of 5 meters.
Beyond this length, there would be a loss of light intensity after the first 5 meters.
To overcome this, it is possible to arrange several lengths of 5 meters (or less), one after the other, by connecting them in parallel to the power supply or the controller.
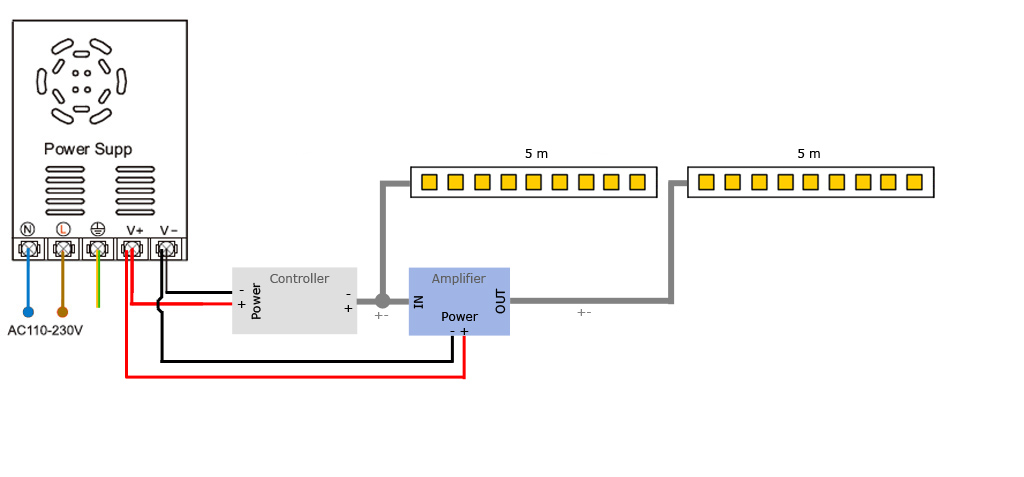
Here is the wiring diagram of multiple strips with the use of a dimmer. The latter will act on all the ribbons, including those connected after the amplifier.
The variable white ribbons (CCT)
This type of headband requires a variable white controller to be controlled. It allows you to turn on, off, vary the light intensity as well as the shade of white.
The 3 wires, red (+), white (cold white/Cool White) and yellow (warm white/Warm white) are to be connected as follows:
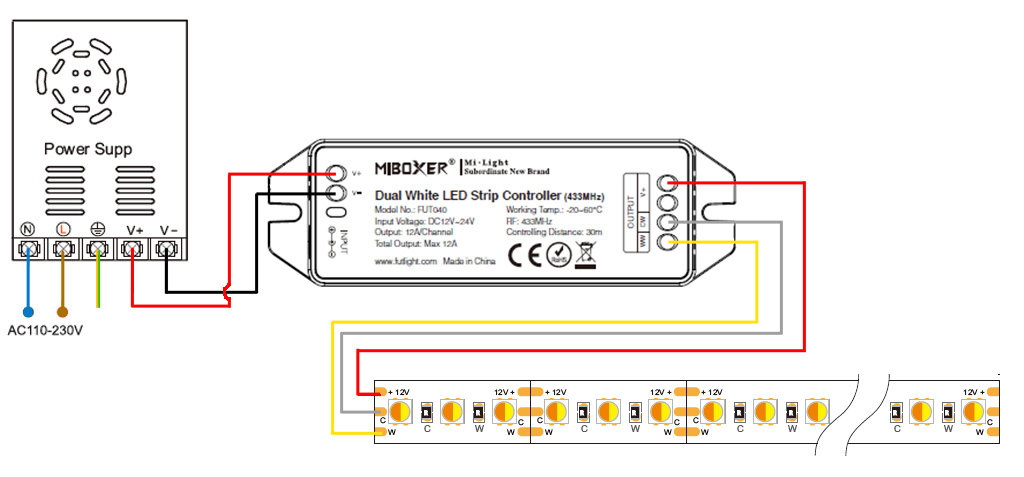
Wiring diagram of several strips whose total length exceeds 5 meters. The cable used is 3-wire (+, cold white (CW) and warm white (WW).

Multicolored RGB ribbons
This headband requires an RGB controller to be controlled. It allows you to turn on, off, vary the light intensity as well as the colors, including white.
The 4 wires, black (+), red (R), green (G) and blue (B) are to be connected as follows:
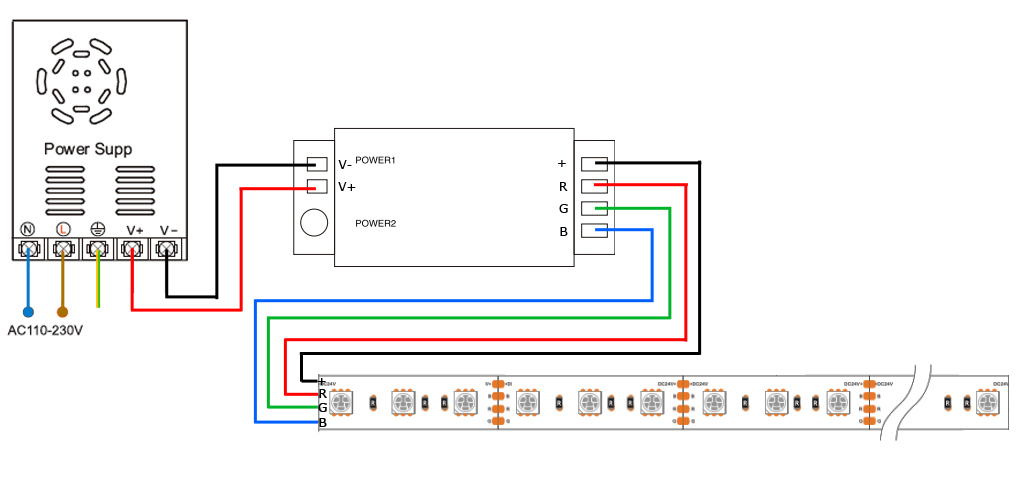
Wiring diagram of several strips whose total length exceeds 5 meters. The cable used is 4-wire (+, red (R), green (G) and blue (B).

The multicolored RGB + white (RGBW) ribbons
This headband requires an RGBW controller to be controlled. It allows you to turn on, off, vary the light intensity as well as the colors and the white.
The 5 wires, black (+), red (R), green (G), blue (B) and white (W) are to be connected as follows:
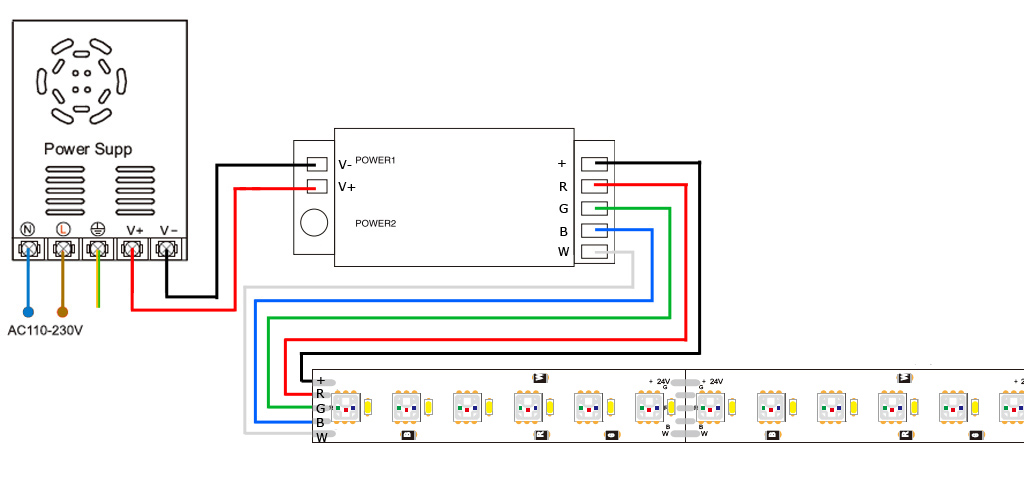
Wiring diagram of several strips whose total length exceeds 5 meters. The cable used is 5 wires (+, red (R), green (G), blue (B) and white (W).
The multicolored RGB + variable white ribbons (RGBCCT)
This headband requires a variable RGB+white controller to be controlled. It allows you to turn on, off, vary the light intensity, the colors as well as the shade of white.
The 6 wires, black (+), red (R), green (G), blue (B), yellow (warm white/WW) and white (cold white/CW) are to be connected as follows: 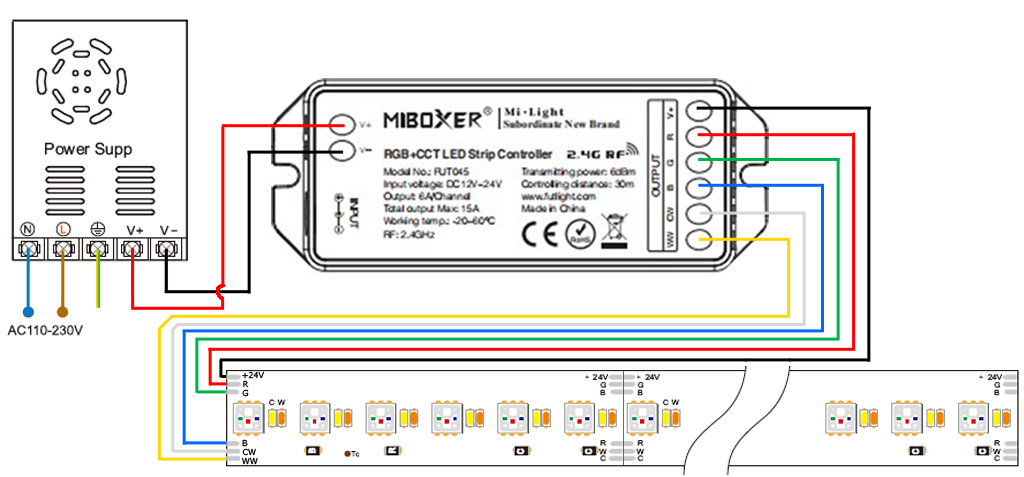
Wiring diagram of several strips whose total length exceeds 5 meters. The cable used is 6 wires (+, red (R), green (G), blue (B), cold white (CW) and warm white (WW).

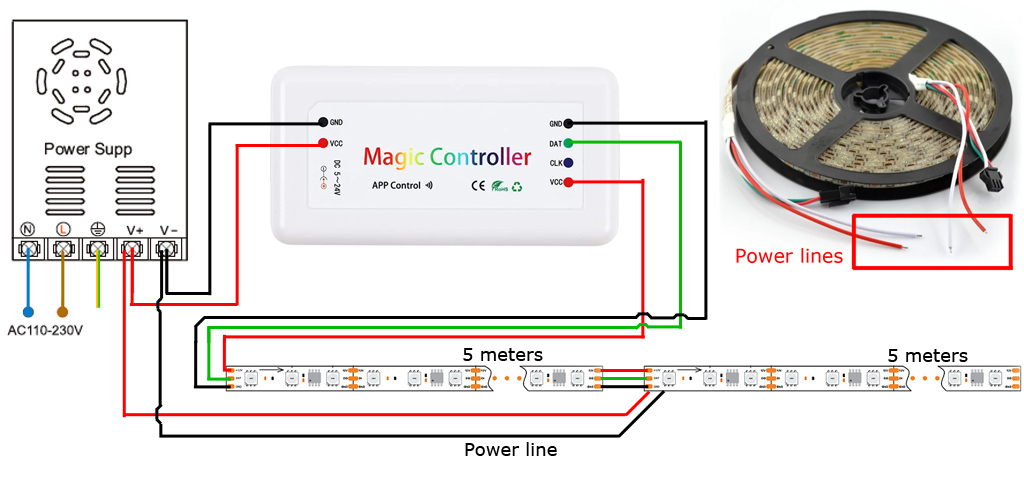
The multicolored ribbons with dynamic effects (WS2811)
This headband requires a specific controller to run the light animation programs.
The 3 wires, red (+), green (DAT), and black or white (GND/-) are to be connected at the start of the ribbon (see the direction of the arrows on the strip) as follows:
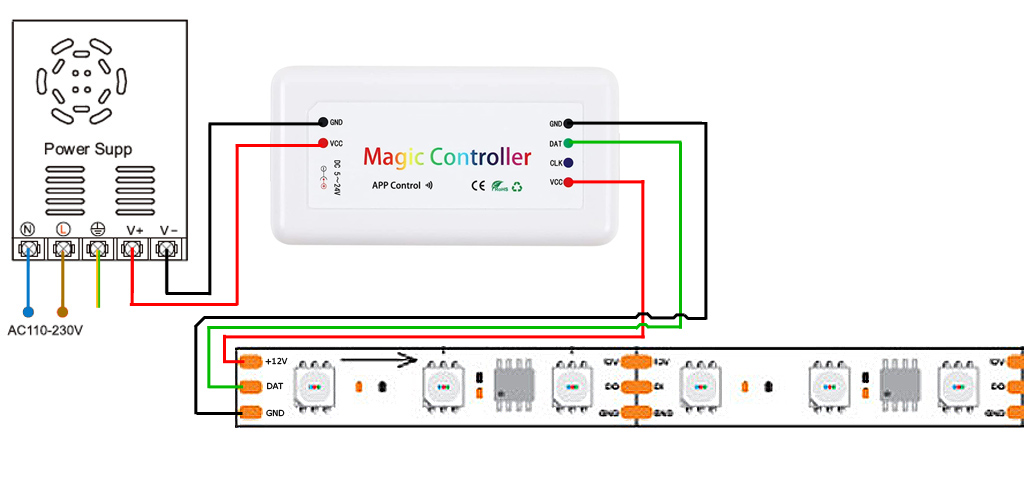
When several 5-meter strips are chained one after the other, it is essential to connect the additional strips to the 12V power supply.
The reel has 3 wires, often connected to a clip-on connector (control circuit), as well as 2 additional white and red wires (power circuit), used to connect to the power supply.
Here is how to do the wiring: